
First Impressions: MSI GS30 Shadow Pt2 - A powerful ultrabook
Welcome back! Yesterday I introduced the MSI GS30 Shadow, and today I will be talking about the specifics of the laptop and its performance whilst away from the docking station. Tomorrow I will talk about the dock in more detail.
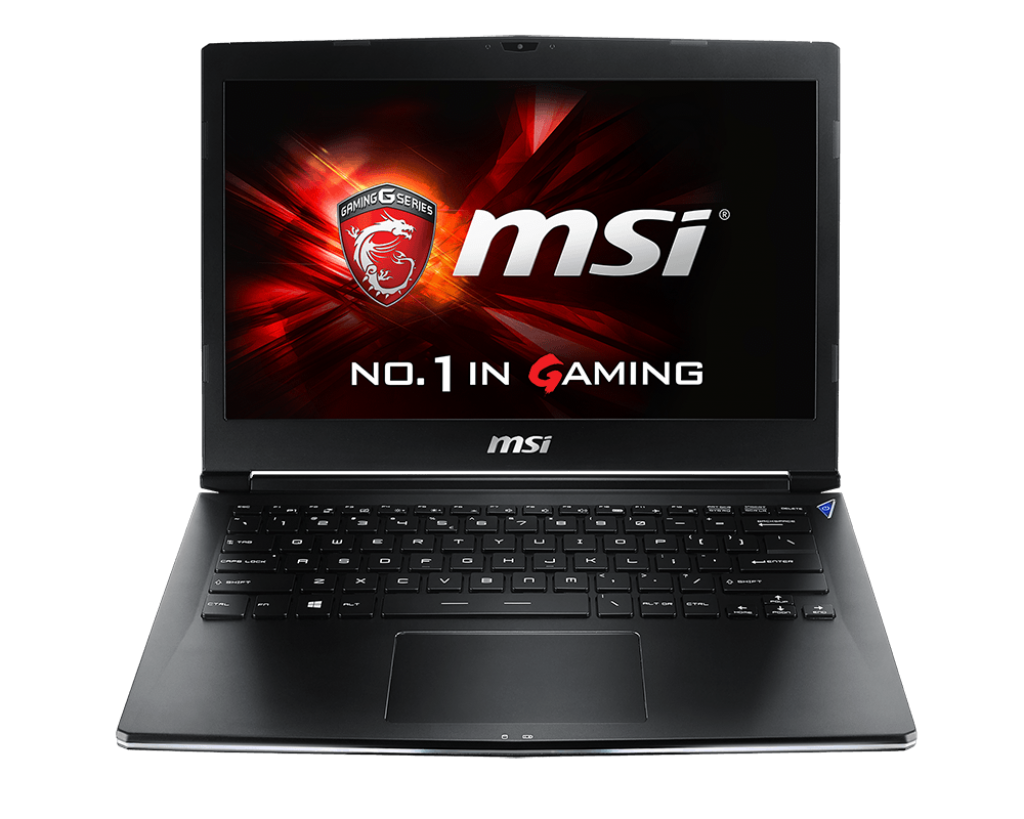
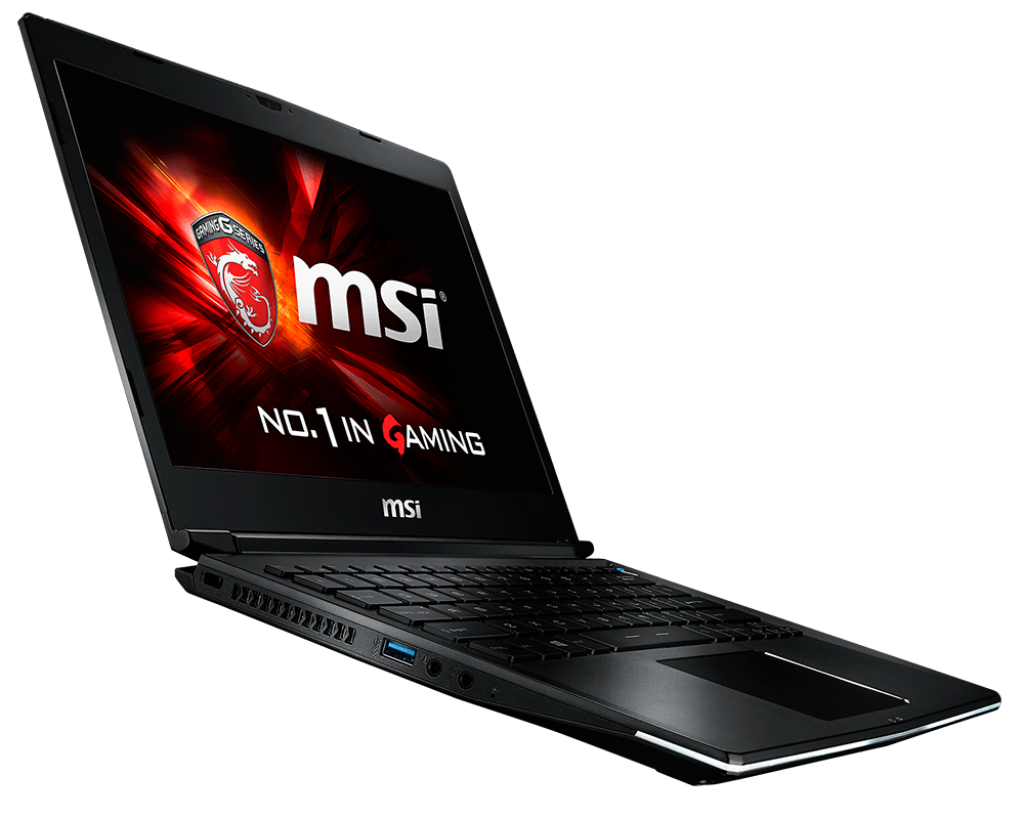
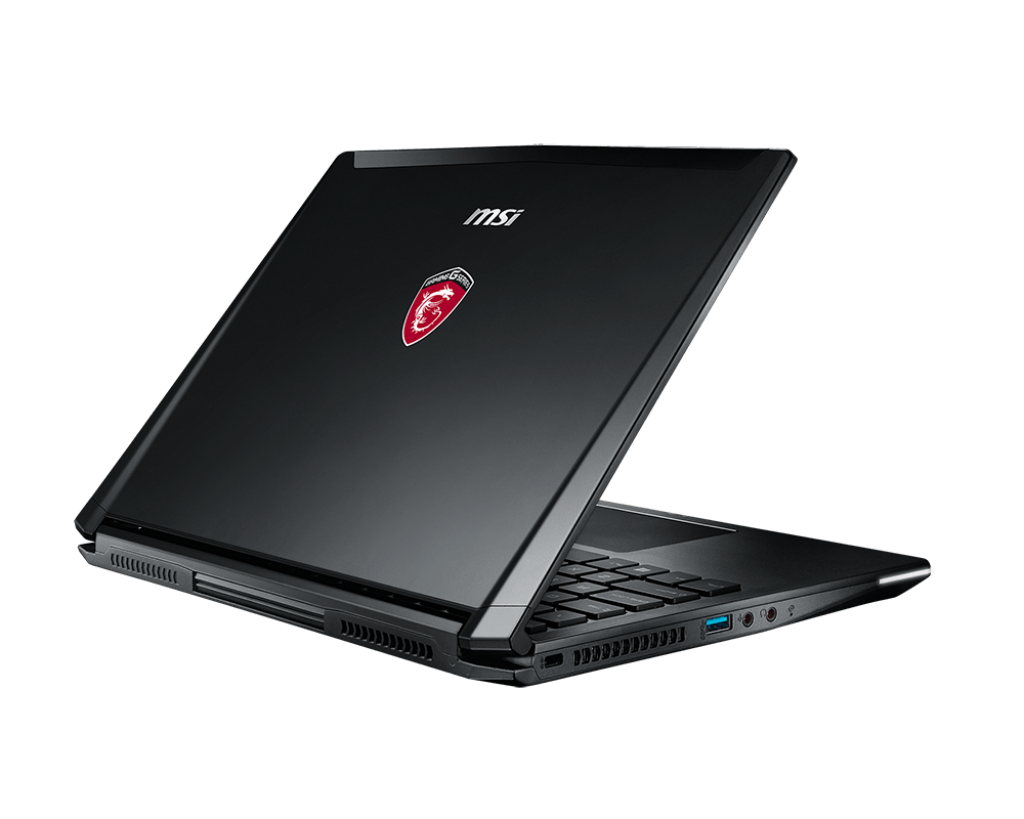
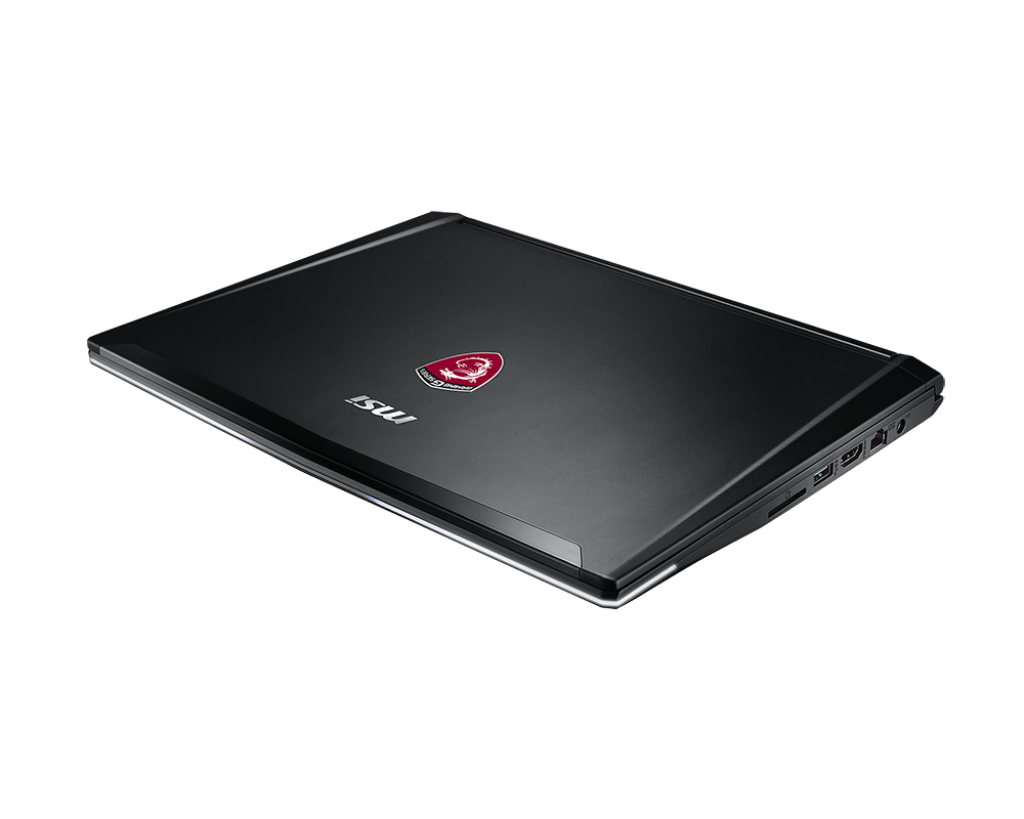
“MSI has come at this new approach to empowering gaming notebooks from a different angle from its competition, focused almost solely on value, performance and design in GS30 Shadow and GamingDock. The result is a machine that can be an Ultrabook in your backpack when you need to get things done and a gaming PC at home that can play with the big boys.”
Upon unboxing the laptop, there were a few things that caught my surprise. Firstly, it is packed at the bottom, with the weighty dock on top of it. More importantly however, the laptop looks really well designed, and is extremely light. The styling is quite plain, quite utilitarian, but on the whole very nice to see. This is not a garish looking machine like the Alienware laptops which screen “I AM A GAMMING MACHINE” at the top of their lungs, this is a quite but extremely powerfully little creature which doesn’t like the limelight. The GS30 reminds me of my older Dell Latitude crossed with my old Sony VAIO. I wish I could say that this design allows it to blend into a corporate environment, but MSI then decided the GS30 did need to look a little like its Alienware competitors. The front bezel has a white light along the front of it, not a simple little white light, but a long beam of white light which really does take away from the look. You can’t turn it off, dim it or change the colour. It is rather disappointing, and just drains battery in my opinion.
The GS30 comes with an interesting array of hardware options, featuring an Intel Core i7 (4th Gen) 4870HQ CPU, 16GB of memory and two 128GB SSDs which are in a RAID0 (stripped) set.
Having a quad core CPU, whilst there are significant reasons to have reservations about putting a such a processor into a laptop, MSI appears to have pulled this one off quite well. Most people I have spoken to about the GS30 ask me one thing, “is it noisy?”. The answer to this is, well, sort of. The GS30 does appear to have some very efficient and well-designed cooling, however if you place a quad core i7 processor under load, there will still be quite a bit of heat generated that needs to go somewhere. Unlike many other laptops, which become hot to touch under extreme load, the GS30 remains cool. The fans can be loud, these are not the quite fans in your Surface Pro, I work in an office with quite a few MacBook Pros, and the GS30 fans are extremely comparable to those.
Coming with 16GB of memory is probably suitable for most developers and gamers, however it would have been really nice to have the option for 32GB. I suspect the limitation here is more around the fact that DDR3 modules for laptops max out at 8GB, and there wasn’t the space to offer 4 memory slots, only 2.
The storage configuration still seems a little bit of a waste for me. Whilst there does seem to be a performance boost, I don’t think it is significant enough overall, but I wonder what the design and cost implications to this one are. I really have to wonder why MSI chose 128 GB SSDs, this does seem to be a very small size, especially for something targeted towards the gamming community. I realise that I have another SATA3 HDD in the dock, but a little more whilst away from the docking station would have been nice. The good news, these drives are replaceable, if you want to touch the warranty void sticker.
The GS30 features a 13 inch, 1920*1200 resolution display with a matte finish. If you like an extremely glossy screen, you might want to look elsewhere. The screen is quite thin, much like any of the high end Sony, Dell and HP laptops, and whilst others have mentioned it seemed “flimsy”, I don’t seem to think it is. This is an extremely nice screen to use and I am very pleased to use it. Viewing angle seems extremely good, and the display is crisp and clear. I do wish for a few things, higher resolution, touch support and a wider opening angle. A higher resolution is always good however it can introduce its own set of issues; touch support seems pretty obvious these days, but it is something you can live without. The last, the opening angle, might seem to be an odd comment, however due to the design of the docking connector, the laptop screen cannot be opened fully and you are limited to about 120 degrees. This isn't a huge issue for me, but I could understand others wanting to open their laptop to almost flat.
The GS30 comes with an Intel Iris Pro 5200 graphics card for times when you are not connected to the dock. This is new from Intel however I have found it to be extremely suitable with a great balance between performance and battery life. I will admit I haven’t tried gaming whilst mobile yet.
There are a bunch of little things that MSI has done really well in the GS30. I really appreciate that internal components like Ethernet, WIFI, Bluetooth and the SD card are not based upon internal USB connections like those found in some low end DELL and HP laptops, and in the Surface PRO. Tight integration with the PCI Express channels provides extremely suitable performance and reliability.
WIFI connectivity is provided by an Intel 7260, and Ethernet is provided (whilst undocked) by a Qualcomm Atheros AR8161. The GS30 doesn’t suffer from the WIFI drop outs suffered by the Surface Pro 1, 2, and 3. My connectivity in the office has improved quite significantly. I am left wondering why MSI didn't package a KillerNIC WIFI and Ethernet controller in the laptop. A significant proportion of MSI’s other devices feature the Killer Double Shot Pro, so why not this one? I thought that would seem pretty logical for their target market, one positive about the use of these two is extremely strong Linux and visualization performance.
Battery life could be better. The GS30 provides about 3 hours battery life in the limited testing I have performed. This isn't great by any means, but isn't the end of the world.
A quick word on the keyboard. Yes it is back lit, however you do not get any control over the colour, nor are there programmable/macro key support like other MSI laptops. To some this could be a disappointment, however in the grand scheme of things, it is something you can live without.
Now for my big rant. I was quite gutted to see that the GS30 doesn't come with a TPM. I realize that this device is targeted towards gamers, and not the security paranoid let’s encrypt everything crowd that I belong to. This is however 2015, how much effort would have it taken to install one? Seriously, they are tiny chips. I can work around that, but this is the one thing I wish I could get MSI to fix!
Join me tomorrow when I review the GS30's dock, gaming and the performance over all.
Kieran Jacobsen
First Impressions: MSI GS30 Shadow Pt1 - A work/play laptop
Over the past few weeks I have been looking to purchase a new laptop for work, I have also been on the market for a new gaming system since mine was rendered inoperable by the removalists. I was in a tough spot, requiring a lightweight and portable laptop for work, and then something with the power to play games when at home.
In the past, I always preferred to keep these two distinct usages types separate, there are a number of distinct advantages to this, as well as a number of disadvantages. Now I had been considering finding something that could at least provide the best of both worlds, or close to that as possible. I want my cake and I want to eat it!
What do I actually need in this laptop? Well the requirements are tricky, but not impossible:
- 12 to 15 inch screen
- 16Gb to 32Gb of memory
- Minimum 256Gb SSD
- Decent graphics performance provided by mid to high end NVIDIA or ATI
- Have some battery life
- Good price point
There were a number of systems which met these requirements to varying degrees, including:
Overall, these laptops are very good, however I just wasn’t convinced that they really would be suitable. Then early last week, I was catching up on more CES 2015 coverage, looking for more reviews and stumbled up an AnandTech article, MSI Announces GS30 Shadow Laptop and GPU Expansion Dock. I was immediately intrigued.
What sets the MSI GS30 Shadow apart from almost every other laptop on the market is its unique docking station. Now you might be thinking, “Kieran I have been using a docking station for 10 to 20 years now, that isn’t something special”, and you could be right at first glance, but the GS30’s dock is very special. For the majority of laptops, their docking stations have become nothing more than glorified port replicators that simply reduce the effort of plugging in all of your accessories. In the past docking stations would provide a significant boost in functionality and often included features like a modular bay for an additional CD drive or Hard Disk, or in the case of the Dell C series, a PCI card. The dock that is packaged with the GS30 is more like the old fashioned docking stations, but on steroids, lots of steroids! The GS30 dock comes with a PCI Express x16 connector, a 450 watt PSU, a 3.5 inch disk drive and SATA3 connector, a KillerNIC network controller and 4 USB3 ports. The dock alone has some serious computing power!

“If you’re curious how MSI is interfacing with all of these extra devices and whether there will be sufficient bandwidth, the answer is that the dock uses a full x16 PCIe 3.0 based connector.”
Whilst MSI announced the GS30 back in September 2014, little was really known about it till the official launch as part of CES 2015. Whilst there are one or two hands on reviews and videos, there is only one through performance review at this point. Even so, I still wanted to get my hands on one, so the next morning I ordered one, and picked it up the very same day. I also got my hands on an MSI NVIDIA GeForce GTX 970 4GB. I was informed by the owner of my local computer store clerk that I was the first owner of a GS30 in Australia.
Join me, tomorrow for part 2 where I discuss the laptop, its features and performance.
Kieran Jacobsen
Posh-CloudFlare managing CloudFlare using PowerShell
The aim of the Posh-CloudFlare module is to simply and automate the management of CloudFlare hosted DNS zones using PowerShell and the CloudFlare Client API. I have made the module available via the PoshSecurity GitHub, here Posh-CloudFlare.
I started looking at CloudFlares API several months ago, as part of another post which I am still working on. Back then I was simply looking at the creation and deletion or records.
Things changed when I found that I needed to spend quite a bit of time working with DNS. Provisioning new infrastructure within cloud environments is something I spend a significant amount of time doing, and am actively investigating the automation of it, and as such, become interested in other parts of the API.
This module now implements all of the Client API, with 22 CMDLets in total. To simplify things, I have documented what CMDLet maps to what API call below:
|
CMDLets |
API Actions |
|
get-CFDNSZoneStatistics |
3.1 - "stats" - Retrieve domain statistics for a given time frame |
|
get-CFDNSZone |
3.2 - "zone_load_multi" - Retrieve the list of domains |
|
get-CFDNSRecord |
3.3 - "rec_load_all" - Retrieve DNS Records of a given domain |
|
get-CFDNSZoneStatus |
3.4 - "zone_check" - Checks for active zones and returns their corresponding zids |
|
Get-CFIPThreatScore |
3.6 - "ip_lkup" - Check threat score for a given IP |
|
get-CFDNSZoneSettings |
3.7 - "zone_settings" - List all current setting values |
|
Set-CFDNSZoneSecurityLevel |
4.1 - "sec_lvl" - Set the security level |
|
Set-CFDNSZoneCacheLevel |
4.2 - "cache_lvl" - Set the cache level |
|
Set-CFDNSZoneDevMode |
4.3 - "devmode" - Toggling Development Mode |
|
Clear-CFDNSZoneCache |
4.4 - "fpurge_ts" -- Clear CloudFlare's cache |
|
Clear-CFDNSZoneFileCache |
4.5 - "zone_file_purge" -- Purge a single file in CloudFlare's cache |
|
Add-CFBlackListIP Add-CFWhiteListIP Remove-CFListIP |
4.6 - "wl" / "ban" / "nul" -- Whitelist/Blacklist/Unlist IPs |
|
Set-CFDNSZoneIPVersion |
4.7 - "ipv46" -- Toggle IPv6 support |
|
Set-CFDNSZoneRocketLoader |
4.8 - "async" -- Set Rocket Loader |
|
Set-CFDNSZoneMinification |
4.9 - "minify" -- Set Minification |
|
Set-CFDNSZoneMirage2 |
4.10 - "mirage2" -- Set Mirage2 |
|
New-CFDNSRecord |
5.1 - "rec_new" -- Add a DNS record |
|
Update-CFDNSRecord |
5.2 - "rec_edit" -- Edit a DNS record |
|
Remove-CFDNSRecord |
5.3 - "rec_delete" -- Delete a DNS record |
The Client API can be a little tricky at first, I have developed the CMDLets in a manner to simplify the learning curve. Typically any API call which modifies or removes a DNS record, would require a rec_id to be specified. This field can be found by querying all of the records in the zone. I have simplified things by performing the search and other API queries for you. You can still specify a rec_id if you like.
Switches and parameter validation sets have been used to simplify some of the other CMDLets, particularly those around minification, security and other zone wide settings.
Finally I have tried where possible to make good use of the Pipeline. There are still a number of areas that could be improved.
Getting Started
The first thing you will need to do, is obtain your API Token. This can be found on your Account page. You will need this, and the email address you use to sign into CloudFlare for the majority of the CMDLets. For CMDLets which modify DNS Zones or records, you will need to specify the zone as well.
To obtain the module, simply perform a git clone to your preferred module location as below:
I have included a demo script, Posh-CloudFlare-Demo.ps1 at the root level of the module, which you can run on the namespace of your choice. I recommend not using your corporate production domain. At the top of this script, simply update the API Token, Email and domain name fields as required.
You can then run the script, and see it manipulate the DNS zone. I am not responsible if this breaks production. This script shows you each CMDLet and it's output. I don't recommend simply running the script, I recommend stepping through each line so you gain more of an understanding.
Potential Uses
The automatic provisionment of cloud hosted environments is why this was developed as well as another project I will announce in the coming future. For now, I see myself working on at least one module to support the automation of Office 365 provisioning, including creating the TXT, MX and SRV required.
Warnings
Firstly, I haven’t finished up the PowerShell help – Naughty! I will work on this one as I go.
Secondly, there might be some bugs. Whilst I have tried to test the majority of the permutations of the code, I can’t be fully sure I haven’t missed something. If you find one, please feel free to contact me and I will make the required fixes, or even better, push your updates up to GitHub.
Kieran Jacobsen
Welcome to Posh Security
I am thrilled to welcome everyone to my new website. This is something that I have been thinking about and working on for a number of months now, and am very glad to see it all finally coming together.
Why Posh Security?
My aim for this blog is, as it always was, to discuss what I am passionate about. My two biggest passions within the industry have always been automation with PowerShell and Security.
To all those that know me or have worked with me, it is pretty obvious that my first passion is PowerShell. I first starting working with PowerShell back in the code-name Monad days when the entire project was just a small concept from Jeffrey Snover (@jsnover); since then I have spent a considerable amount of time working with it, and have seen it develop and flourish into a truly amazing platform.
My second passion is the information security field. For a number of years I have been an avid follower of all movements within the information security industry, and I will admit that I spend a significant portion of my free time keeping up with the latest trends, tools and exploits. I have always been a big believer that security starts with those deploying and supporting systems, including system administrators, architects and developers. These employees should be highly skilled in various security concepts thus ensuring that they are actively working to ensure the security of an organisation and that an organisations security posture does not simply rest on the security and compliance teams.
I also believe that right now, there is a significant level of interest in PowerShell in the security community, and over the past few years, there have been a number of people who have had mode significant process in this field, including Matt Graeber (@mattifestation), Carlos Perez (@darkoperator), and Matt Johnson (@mwjcomputing). I was presented with my own opportunity to further the discussion on PowerShell and its security implications in 2014, when I was asked to present at CrikeyCon. I was encouraged to do so by the always amazing Ash (@Ashd_au) and Wade Alcorn. I was then, and still am astounded by the feedback from that presentation, and my follow on appearance on Risky.Biz.
I have since been working on a number of project which I hope to present to the greater community over the coming months.
Why a new blog now?
There were so many reasons to start a new blog at this time.
I actually started down the path several months ago, however things prevented me from launching the site earlier. Whilst I feel that launching a new site on the 1st of January is a touch cliché, like a New Year's resolution, overall it feels like the best time to do so.
In early November, I joined an amazing team at Readify as a Technical Lead. My focus in this role is in supporting the infrastructure that allows all of our wonderful consultants and developers to achieve the best for Readify's customers. I am extremely excited at the amount of potential PowerShell development I have ahead of me, as well as working within the Microsoft Azure space. Special thanks goes out to Tatham Oddie for his encouragement during the application process and over the past few weeks. Readify is an amazing place to work, and I recommend that people take a look at the Readify Recruiting process, including the Knock Knock challenge. Completing the challenge was extremely interesting and a lot of fun.
The new role also lead me to move to a new city! I have recently moved from hot and sunny Brisbane to beautiful Melbourne. With a new job, city and year, everything seemed right for a new website!
Moving Forward
You should have already started to see that my old site, aperturescience.su is now redirecting to poshsecurity.com, all of the content and addresses should have been migrated from the old to the new site.
I have setup @poshsecurity on Twitter with the aim to keep this to simply new post notifications and associated commentary. I will also post to this whenever a new GitHub repository is created or when I make major updates to my code. I wanted to have a Twitter address that people could follow and receive updates about the site and not have to also receive unwanted or unrelated messages/re-tweets. You can follow@poshsecurity for site and code updates, for follow my personal account at @kjacobsen.
Speaking of code, I have created a GitHub organisation called PoshSecurity. This is where all the associated code for posts will go from now on. As code is improved and redeveloped, it will most likely be moved from my GitHub over to the PoshSecurity organisation. I will leave some personal repositories directly under my account.
One minor improvement is that I am planning on switching from code comments hosting with PasteBin to using Gists. Whilst they pretty much provide like-for-like functionality, the ability to clone Gists, leave comments and also maintain reversion history, makes them more useful.
Another change is that I have decided to make use of Disqus for comments. I know that the platform can be a pain, however there are some really neat things it can do. I feel that it might encourage more discussion, whilst discouraging some of the spam I have previously had to manage.
I will look at Tumblr/Facebook pages/Google+ down the track, but I think for now, this is enough to get started. In the future I am going to also look at putting up video guides on YouTube etc.
A very big thanks goes out to my Partner, Daniel and his sister Eileen. The two have greatly assisted in the development of the new site including the name, themes, layout and so much more. I highly recommend that people check out Eileen’s site, The Food Avenue, where she writes about food and fashion.
Once again, I would like to welcome everyone to the new site. I hope that people enjoy everything that I have planned for the future on this site. I welcome people to provide feedback on what they would like to see on this site. Leave a comment down below or use the Contact page.
Tips For Managing Microsoft SQL 2012 Always On Availability Groups
Recently I have been spending a significant amount of time working with high availability and disaster recovery solutions. A large amount of this work has been around the deployment and use of SQL2012 AlwaysOn Availability Groups.
Availability Groups should not be confused with SQL Clusters, whilst both technologies make use of Windows Fail-over Clustering; they achieve their goals in some very different ways.
I am not going to go into specifics around the design and deployment of an AlwaysOn Availability Group solution; however, I have some design tips that should help you suffer any serious setbacks.
Firstly, confirm vendor application support. This might seem obvious but it is extremely important. There are a number of applications that do not support AlwaysOn AGs, the list includes Microsoft SCCM2012R2 (and other products in the System Centre Family) as well as some products from Citrix (patches on their way). If you are running any of the products that do not support these features, then you will need to revert back to a normal Fail-over Cluster (or in my case, a geo-cluster).
Secondly, find a reliable place for a File Share based Witness, preferably a second side. This tip is of particular importance if you are running across multiple sites. You should be also aware that the server hosting the share must to be in the same domain as the SQL servers.
Next, check the implications of using AlwaysOn AGs on your Microsoft Licensing. All of the new features come at a cost; you need ensure that you do not affect your overall solution costs. Remember, with AlwaysOn AGs, SQL is actually running on all of your nodes, all the time and this could affect you license requirements.
One annoying thing, you cannot easily create our listeners if you do not have any databases. My tip to bypass this is to simply create an empty database, and then create the AlwaysOn AG and its associated listener based on that database. Once you have that done, then your applications installers can be run against the listener. REMEMBER though, that if an application creates databases via the listener name, they are not configured as part of the AlwaysOn Group, you will need to go and do that manually! I was caught with this one.
I had some issues when creating AlwaysOn AG and the associated listener. These two articles really helped me out:
Sending SYSLOG messages from PowerShell
I have performed a number of updates to the PowerShell SYSLOG module since this post. You can read the latest post. The module has been renamed to Posh-SYSLOG.
The GitHub location has been moved to https://github.com/poshsecurity/Posh-SYSLOG.
The module is now available on the PowerShell Gallery.
I had this need to send some SYSLOG messages from PowerShell, and there are many reasons why you might want to do this one, from notifications to logging, SYSLOG can be very handy.
I looked around online and could not find a really simple and easy to use piece of code. There were some examples out there, but they were all a little rough around the edges, and I knew I could clean them up and improve upon their design.
Before we get to the code, let us take a quick look at the SYSLOG protocol. According to Wikipedia, the SYSLOG protocol was originally developed in the 1980s by Eric Allman as part of Sendmail and is now standardized by IETF in RFC5424.
A standard SYSLOG message consists of four things:
- A priority - how bad is it?
- A Timestamp - when is this occurring
- A hostname - who is sending the message
- A Message - kind of obvious
One thing to note is that the priority is not that simple. The priority in the message is actually made of two things: the severity and the facility, or what the application or subsystem generating the message is. The levels are defined in the tables below:
| Facility Number | Keyword | Facility Description |
|---|---|---|
| 0 | kern | kernel messages |
| 1 | user | user-level messages |
| 2 | mail system | |
| 3 | daemon | system daemons |
| 4 | auth | security/authorization messages |
| 5 | syslog | messages generated internally by syslogd |
| 6 | lpr | line printer subsystem |
| 7 | news | network news subsystem |
| 8 | uucp | UUCP subsystem |
| 9 | clock daemon | |
| 10 | authpriv | security/authorization messages |
| 11 | ftp | FTP daemon |
| 12 | - | NTP subsystem |
| 13 | - | log audit |
| 14 | - | log alert |
| 15 | cron | clock daemon |
| 16 | local0 | local use 0 (local0) |
| 17 | local1 | local use 1 (local1) |
| 18 | local2 | local use 2 (local2) |
| 19 | local3 | local use 3 (local3) |
| 20 | local4 | local use 4 (local4) |
| 21 | local5 | local use 5 (local5) |
| 22 | local6 | local use 6 (local6) |
| 23 | local7 | local use 7 (local7) |
and
| Code | Severity | Keyword | Description | General Description |
|---|---|---|---|---|
| 0 | Emergency | emerg (panic) | System is unusable. | A "panic" condition usually affecting multiple apps/servers/sites. At this level it would usually notify all tech staff on call. |
| 1 | Alert | alert | Action must be taken immediately. | Should be corrected immediately, therefore notify staff who can fix the problem. An example would be the loss of a primary ISP connection. |
| 2 | Critical | crit | Critical conditions. | Should be corrected immediately, but indicates failure in a secondary system, an example is a loss of a backup ISP connection. |
| 3 | Error | err (error) | Error conditions. | Non-urgent failures, these should be relayed to developers or admins; each item must be resolved within a given time. |
| 4 | Warning | warning (warn) | Warning conditions. | Warning messages, not an error, but indication that an error will occur if action is not taken, e.g. file system 85% full - each item must be resolved within a given time. |
| 5 | Notice | notice | Normal but significant condition. | Events that are unusual but not error conditions - might be summarized in an email to developers or admins to spot potential problems - no immediate action required. |
| 6 | Informational | info | Informational messages. | Normal operational messages - may be harvested for reporting, measuring throughput, etc. - no action required. |
| 7 | Debug | debug | Debug-level messages. | Info useful to developers for debugging the application, not useful during operations. |
Here are a few examples:
- Emergency Message from Kernel = (0 * 8) + 0 = 0
- Alert from User = (1 * 8) + 1 = 9
- Informational from mail = (2 * 8) + 6 = 22
When you look at a SYSLOG servers output, it probably has the severity levels and facilities nicely printed, all it is doing is reversing the process. For example, if we received a priority of 58, we would firstly divide 58 by 8, this comes out at 7.25, if we just take the whole number, we can see that this was a message from the NEWS facility, if we take 7*8 from 58, we get 2, and this, we know this was a critical severity message.
As you can see, the whole thing is rather easy. The SYSLOG protocol is brilliant in its simplicity.
So, back to PowerShell.
If we were going to write a PowerShell CMDLet to send a SYSLOG message, what would it look like?
Let us start with parameters. We are going to need to know the SYSLOG server we want to send the message to, we need a message to send, and we need to define the severity and facility that is sending the message. Optionally we might want to specify the hostname of the machine sending the message (we can get this if not specified), we might want to specify a timestamp (but we could get lazy) and finally our SYSLOG server might be running the service on a different port, so we should be able to specify the port if it is different from the default, UDP514.
How do we go about specifying the severity and facility levels? We don’t want to force users to remember 0 through to 7 and 0 through to 23? We need to make this easier! How about some sort of data type? Thankfully, we can use ENUM types within PowerShell to define some simple data types and simplify specifying these parameters. If you don’t know about ENUMs, I suggest you do some Googling, they are very handy and quite useful.
What would the ENUM definitions look like?
For those of you who don't know, each item in the ENUM is assigned a number, starting with 0. We will use these numbers as part of our calculation of the priority.
So once we have these data types defined, what's next? Let's take a look at parameters. Parameter's for a function are pretty straight forward, destination server, message, severity, facility, hostname, and date/time stamp are all we really need. In terms of mandatory parameters, only the first 4 are, we can determine the other two for the user.
What's next? Well, what about determining the priority to be sent based upon severity and facility?
The only other tricky part is the date/timestamp, but once again, that isn't too tricky. We just use Get-Date and a custom specified format.
Finally let's stick it all together:
Well we now have a message to send to the syslog server? Well all that is left to do is encode and send the message using a UDP client object.
The finished CMDLet looks like this:
You can also see the finished product on my GitHub. I built a module based upon my prefered structure here.
As you can see, this is all pretty simple stuff. Now we get to go off and user it in your scripts! Using this CMDLet is pretty simple, there is an example included in the comments. Simply specify the various details, and then check your SYSLOG server to see the results.
Stay tuned into my blog for a non-PowerShell post about some issues I recently faced with Windows Integrated Authentication.
Assessing the impact of Supermicro BMC vulnerability with PowerShell
So there has been quite a bit of news around a vulnerability in some of Supermicro's Baseboard Management Controllers (BMC) which allows an attack to remotely retrieve the admin credentials for the BMC system remotely (and in plain text). You can find the original write up by CARI.Net, as well as SANS and Arstechnica.
Most recommendations that have been provided about assessing if you have vulnerable systems have involved netcat (nc), which has to be one of the best tools in a sysadmins utility belt, however, speaking from experience, it has the drawback that some anti-virus products don't like it, which results in security people complaining. There is another way, and that is to use PowerShell.
It is pretty simple to use the Invoke-WebRequest CMDLet, specifying a the URI you want to test. The URL in this case will be HTTP://<your server>:49152/PSBlock. If we can't connect, or receive a 404 file not found, then we are probably ok, if we receive content back, then we need to take a closer look!
So what does our PowerShell expression look like?
If you get content returned, then you really do need to investigate further. Hopefully this is a good example of also how to use Invoke-WebRequest.
Creating GUIDs with PowerShell
This will be a really short ones folks, but this is something I have found incredibly useful over the last few days.
Ever needed to create a GUID from within PowerShell? Well it turns out to be incredibly easy, we just leverage the .Net framework.
To create a GUID, simply use "[GUID]::NewGuid().GUID" and that will return the GUID as a string.
I told you this would be short and simple.