
Enabling Mobile Device Management with Office 365
Microsoft recently announced that they would be including a Mobile Device Management (MDM) platform as part of Office 365. What this means is that organisations, both small and large now have an extremely easy and powerful MDM available to them, without any additional charge to their Office 365 licencing. Administrators can manage Android, iOS and Windows Phone devices, and enforce various corporate policies and standards.
To support the new MDM functionality, you will need to create two new DNS records in each of your Office 365 domains. I have updated the Posh-Office365CloudFlare script to support the creation of these two additional records. You can create these records via the -MDMEnable parameter.
The process for creating the entries is as simple as:
Register-Office365.ps1 -CloudFlareApiToken <token> -CloudFlareEmailAddress <email> -Domain <domain> -MDMEnable
Just a quick note, I am yet to fully test out the new MDM functionality as none of my existing tenants have enabled for it yet.
Kieran Jacobsen
Upcoming Presentation at Victorian .Net User Group
I am excited to announce that I will be presenting PowerShell Shenanigans – Lateral Movement with PowerShell, to the Victorian .Net User Group.
This presentation will be an updated version of the one from CrikeyCon 2014, BIG and OWASP Brisbane.
Information about the session is listed below, and you can register here at Eventbrite.
PowerShell Shenanigans (Lateral Movement with PowerShell)
PowerShell, the must have tool and the long overlooked security challenge. Learn how PowerShell’s deep integration with the Microsoft platform can be utilized as a powerful attack platform within the enterprise space. Watch as a malicious actor moves from a compromised end user PC to the domain controllers and learn how we can begin to defend these types of attacks
About the Speaker
Specialising the automation of Windows Server environments, and with 10 years’ experience in the managed services and financial services sectors, Kieran Jacobson recently moved from sunny Brisbane to Melbourne to pursue a role as a Technical Lead with Readify. Kieran has always been a passionate member of the technical community, beginning as a Microsoft Student Ambassador and then as a presenter at a number of conferences including Infrastructure Saturday, CrikeyCon and Risky Business. Kieran maintains the Posh Security website, http://poshsecurity.com, with content ranging from automation, architecture, troubleshooting and software development.
Event Details
- When: 5:30 PM, Tuesday, 7th April 2015
- Where: Sportsbet, Level 15, 367 Collins Street, Melbourne
- RSVP: Register attendance at http://vicdotnet-apr2015.eventbrite.com.au

Automating Office 365 deployments in CloudFlare
A few weeks ago, I wrote about Posh-CloudFlare, a PowerShell module I created for managing CloudFlare hosted domains. Since then, I was working on extending an Office 365 deployment, and realized that what was needed was a script which could automate the configuration of new domains. With that in mind, I developed a new PowerShell script, Posh-Office365CloudFlare.
Let's understand the process for the addition and configuration of a new domain for Office 365.
The process starts with the Office 365 Portal. We navigate to the Domains section, click the "Add Domain" button, and after ignoring the introduction, we proceed to step 1. This step starts with us entering our domain name, let's use our old favorite contoso.com. Now we will be asked to verify that we own this domain, either through the creation of a TXT record or an MX record. The typical method is to use is that of a TXT record, created at the root of our desired domain with a value something like "MS=mx********".
After we create the domain, and the wizard successfully sees the appropriate record, we will be allowed to proceed to the next step. Step 2 isn't one that I usually make use of. I typically don't want to modify my users email domains, nor do I want to add new users at this time. I skip this step and move straight on to step 3.
Step 3 starts with another quick introduction screen, and then we will be asked if we would like the DNS for this domain to be managed by Microsoft. Obviously, we are going to answer no and move on. Finally, we reach an important step, we are asked what we want to do with this domain. First, "Outlook for email, calendar, and contacts", or in other words, email; the second, "Lync for instant messaging and online meetings", which is kind of obvious.
If you select “Outlook for email, calendar, and contacts”, then we will be told to create the following records in contoso.com:
- MX - @.contoso.com - which points to contoso-com.mail.protection.outlook.com (priority 0)
- CNAME – autodiscover.contoso.com – which points to autodiscover.outlook.com
- CNAME – msoid.contoso.com – which points to clientconfig.microsoftonline-p.net
- TXT – @.contoso.com – which contains a SPF record
If you select “Lync for instant messaging and online meetings”, then we will need to create the following records for contoso.com:
- CNAME - sip.contoso.com - which points to sipdir.online.lync.com
- CNAME - lyncdiscover.contoso.com - which points to webdir.online.lync.com
- CNAME – msoid.contoso.com – which points to clientconfig.microsoftonline-p.net
- SRV - _sip._tls.contoso.com - with its appropriate port, weight, priority and target
- SRV - _sipfederationtls._tcp.contoso.com - with its appropriate port, weight, priority and target
Reviewing this list of records, we will notice that the only record that changes for each domain is the MX record. The record consists of the domain name we want to add, with dashes replacing the original dots in the domain name. As you can see in the above example, cotoso.com's MX record points to contoso-com.mail.protection.outlook.com, where as awesomecompany.net would point to awesomecompany-net.mail.protection.com.
What about some records that could actually help our users? What if I said we could redirect sub domains of our own to the Outlook Web Access page? Wouldn't it be awesome if a user entered https://mail.contoso.com into their browser, and ended up with the Outlook Web Access? This can be achieved by creating a CNAME record that points to mail.office.com. Let's have our script create entries for mail and webmail perform this redirection.
Now back to the script.
This was a simple script, it doesn't have any complex logic, it will need the following information:
- CloudFlare API Token and email address; this is obvious as we need to talk to the CloudFlare Client API.
- The domain name.
- Do we want to create mail records? Lync records or both?
This is a very, very simple script, we just need to have a set of New-CFDNSRecord calls, with various controls depending on what we require.
For example, creating the MX record is as simple as:
This script only took an hour or so for testing and development time, however there was quite a bit of effort directed to changes in the Posh-CloudFlare and the New-CFDNSRecord CMDLet. If you look at the diff's between the last few versions, you will notice the following changes:
- The CMDLet now accepts input from the pipeline (in this case via property name).
- Restructure the CMDLet into Begin/Process/End (required for proper handling of pipeline input).
- Implementation of parameter sets.
- Cleanup of the validation of parameters.
I added parameter sets to New-CFDNSRecord with the aim to remove the somewhat faulty validation that I had previously. Whilst this sounded, and looked like it was simple, it actually took a few tried to ensure that the CMDLet would function appropriately. This was really interesting and deserves its own post in the future.
Parameter validation was updated in all of the CMDLets to improve email address validation. Previously, validation consisted of testing for an "@" character. Now I am using a regular expression.
Finally, I have spent some time cleaning up the code, not just within New-CFDNSRecord, but across all of the CMDLets. I have been trying, where possible to use ISE Steroids to ensure that everything I right is neat and presentable; it is a fantastic resource.
My final thought on all of this journey is, why couldn't Microsoft have implemented something like this? Microsoft has integrated the process with a bunch of other DNS providers, including the likes of GoDaddy, Network Solutions, 1 and 1 and even Yahoo Small Business. Why can't it also look at CloudFlare?
You can find the finished script over at GitHub, at Posh-Office365CloudFlare, the script is called Register-Office365.ps1. I have included comment based help with examples.
Kieran Jacobsen
Crossing the PowerShell streams
I was recently working with the PowerCat code which was capturing the Pipeline and Error output of code, and wondered, could I also capture the other messages being displayed? Why couldn’t I also redirect the warnings or the verbose output as well?
Let’s revisit how the redirection of the streams works in PowerShell, and hopefully learn about how PowerShell does things under the covers.
To explore the output streams, I am going to use the CMDLet I have below, which is a varation of the one June Blender used in her post on this topic.
It should also be noted that redirection to a variable is similar as to a file. In my examples I am redirecting to a variable.
So what happens if we run this CMDLet normally? We should see four distinct messages, first is out the text we are displaying by just returning a string, next we will have our write-output, then we have write-warning, and finally we will have the wrote-error message (and its associated trace).

What happens if we decide to assign the output to a variable called $output? Let’s take a look.

As you can see, after running the function, we still saw the warning and error messages. What was stored in the variable? Well if we look at that we can see that the text return and the write-output were successfully assigned to the variable $output.
Ok, so how about we apply the old redirection rules that have existed in every shell since the 80s?

Well this is much as we expected, but wait, the warning was displayed and not captured in the variable. The variable has our two output strings and it also has the write-error message as well. As a side note I love how the when calling $output PowerShell still displays the error in red.
If you are running PowerShell 2.0 (or less), this is the end of the line for you. There is no help for you.
If you are running PowerShell 3.0 (or greater), then how do we capture that warning message? What about the verbose?
With the introduction of PowerShell 3.0, Microsoft included support for capturing the other streams, and they did so in a method which is simple, clean and logical. Microsoft simply extended the stream redirection along the well-known and practiced methods.
Let’s take a look at the streams in PowerShell 3.0:
| Stream Number | Stream Description | Redirection |
|---|---|---|
| 1 | Pipeline/Output/Success | > |
| 2 | Error | 2>&1 |
| 3 | Warning | 3>&1 |
| 4 | Verbose | 4>&1 |
| 5 | Debug | 5>&1 |
| * | All | *>&1 |
Let’s take a look at the previous example again, however this time we will redirect the output of stream 3, warning, to stream 1.

As you can see, we captured this information just as expected.
Let’s try verbose output now.

We can see that simply using 4>&1 captures the output. We can also capture all output using the wildcard, *>&1.

I can hear one person asking, “But what about write-host?”
There are many reasons why you should not use write-host, firstly, Jeffrey Snover, the creator of PowerShell says not to, Don Jones, a PowerShell MVP says “Write-host kills puppies” <link>, however both agree, as does the PowerShell community, that there are some times when it might be handy to use Write-Host. Write-Host is black PowerShell magic, it’s the dark side of PowerShell. It is not something you should do without very thoroughly thinking about what you are about to do.
The only legitimate time to use Write-Host, is when you do not want to interrupt or pollute your stream. If you have a situation where you wish to display text to the user in such a way that it will not be caught up in the pipeline.
I only use Write-Host in one piece of code. I use it as part of my modular alerting framework, where I know that the message needs to be seen by the actual user of the code. I also didn’t want event/alert messages contaminating any of my other pieces of code. When I wrote the code, I knew it was a risky piece of code, however it has a clear cut function and purpose.
So what happens to Write-Host and redirected streams? To show you, I have added a Write-Host line to our previous CMDLet as show below:
Let’s run the code, redirecting all input (*>&1) into $output.

As you can see, the write-host was still displayed, everything else was captured in $output.
So what information is around on stream redirection? There are three good resources, firstly, check out June’s post on Hey Scripting Guy, secondly, PS> Get-Help about_Redirection and finally, there is the Microsoft Connect entry where the functionality was requested.
Kieran
PS. No streams were crossed during the creation of this post.
Hacking with a rubber duck
On the weekend I had the pleasure to present at CrikeyCon 2015. I want to thank everyone involved including the organizers; the other speakers; our wonderful MC, Patrick Gray from Risky Business; and of course the attendees!
This year I chose something a bit different to present on, the Hak5 Rubber Ducky. I started with two (and one failed,) demonstrations in the morning before setting up in the events area to show off some more advanced demonstrations.
As promised, I am posting up my content for everyone to make use of it.
Firstly, the PowerPoint slides can be downloaded here, or viewed on SlideShare here (and below).
I have setup a separate page on this side, Rubber Ducky, where you can find the scripts/payloads and a description with each.
There are a number of links which I found to be extremely useful.
If you have any questions, comments, or feedback please feel free to leave a comment, contact me via this site or send a message to me on Twitter.
Kieran
Revisiting Syslog in PowerShell
I have performed a number of updates to the PowerShell SYSLOG module since this post. You can read the latest post. The module has been renamed to Posh-SYSLOG.
The GitHub location has been moved to https://github.com/poshsecurity/Posh-SYSLOG.
The module is now available on the PowerShell Gallery.
I often wonder, as I am sure most developers do, if people ever actually read and use the code that I post online. Was it helpful to them or was it useless? Did they use it for something interesting? One piece of code which I know people do use, is my PowerShell SYSLOG code.
A few weeks ago, a user opened my very first GitHub issue! This issue appeared at first to be simple, but as the user and I started to delve into the complexities of the various SYSLOG RFCs, I realized it was far from it.
Before we get into the issue, the code and the resolution, it is worth highlighting that there quite a few IETF RFCs that relate to SYSLOG messages. The two primary ones being:
- RFC 3164 - BSD SYSLOG. This actually wasn't an IETF standard.
- RFC 5424 - IETF SYSLOG. This is a IETF standard. This obsoletes RFC 3164.
There are also RFCs:
- RFC 3195 - Reliable Delivery for SYSLOG
- RFC 5425 - TLS Transport Mapping for
- RFC 5426 - Transmission of SYSLOG Messages over UDP
- RFC 5427 - Textual Conventions for Syslog Management
- RFC 5848 - Signed Syslog Messages
- RFC 6012 - Datagram Transport Layer Security (DTLS) Transport Mapping for SYSLOG
- RFC 6587 - Transmission of SYSLOG Messages over TCP
I want to send a very big thanks out to the user, DFCH for reporting the issue, helping me understand the RFCs in question and also testing the resulting code.
The Issue
So what was the issue? As DFCH stated:
“The Cmdlet send-syslog.ps1 states in its description to send a syslog message as defined in RFC 5424. However the generated timestamp in the Cmdlet incorrectly formats a timestamp when none is specified by the caller, nor does it validate or convert the timestamp if specified by the caller.”
I will admit that I hadn't ready RFC 5424 or RFC 3164 in a huge amount of detail. As soon as I did it was very obvious that the code was not producing an appropriate timestamp, it also become evident that the overall message I was sending did not meet the RFC specification.
From my analysis, it appeared that I had crossed parts of both RFC 5424 and RFC 3164, ending up with code that wasn't fully complaint to either, and in the long run, not entirely useful.
As DFCH reported, the code didn't not generate the appropriate timestamp, with issues in how it was formatted as well as the precision. Resolving these issues was quite simple, the timestamp could be formatted as recommended by DFCH, this not only resolved the format issue but also increased the precision. Validation of the caller specified timestamp was also easy to implement. I simply changed the parameter to take an object of type DateTime instead of a String.
But this was just the start of the fixes, as I continued to read and understand the RFCs, I realized my messages were incorrectly formatted as well.
Message Formats
There are two valid SYSLOG message structures as defined in RFC 3164 and 5424.
Firstly, RFC 3164 specifies the message structure to be the following:
<PRI>TIMESTAMP HOSTNAME TAG CONTENT
Where:
- PRI - Value based on severity and facility
- TIMESTAMP - What date and time with format MMM dd HH:mm:ss
- HOSTNAME - Who is sending the message
- TAG - Name of the process or program generating the message
- CONTENT - Obviously the message being sent
Next, RFC 5424 specifies the message structure as:
<PRI>VERSION TIMESTAMP HOSTNAME APPNAME PROCID MSGID STRUCTUREDDATA [CONTENT]
Where:
- PRI - Value based on severity and facility
- VERSION - Version of the SYSLOG message (typically 1)
- TIMESTAMP - What date and time with format: yyyy-MM-ddtHH:mm:ss.ffffffzzz
- HOSTNAME - Who is sending the message
- APPNAME - Name of the process or program generating the message
- PROCID - Process ID of the application or script
- MSGID - An Identifier to assist in troubleshooting
- STRUCTUREDDATA - RFC 5424 specifies a method of sending key/value pairs
- CONTENT - Obviously the content of the message
One thing to note with RFC 5424 is that the majority of the fields are optional, you still need to send something to ensure the correct layout however, so the nil value "-" is sent. I should also point out that the RFC states that the CONTENT section at the end is completely optional. If nothing is sent, you don't need to even send the nil value.
My original code on the other hands, was sending messages with the structure of:
<PRI>TIMESTAMP HOSTNAME CONTENT
Where:
- PRI - Value based on severity and facility
- TIMESTAMP - What date and time with format: yyyy:MM:dd:-HH:mm:ss zzz
- HOSTNAME - Who is sending the message
- CONTENT - Obviously the message being sent
How did this happen?
Well, there are a few reasons why this occurred, in no particular order.
- I borrowed some of the logic and ideas from other .Net and PowerShell code samples
- I didn't read either RFC
- The SYSLOG servers I tested against were not stringent in their rendering of messages received.
- I referred to Wikipedia when I was checking that my messages were correctly formatted.
In hindsight, the biggest mistakes were using Wikipedia as my guide, and not testing against a more RFC compliant server.
Using Wikipedia as a source for developing compliant code is probably a bad idea, on this occasion it was a great learning experience. Previously the SYSLOG Wikipedia article did not correctly describe the layout and formatting of the full message, crucially missing out the information about the TAG field. The article has been updated since then with corrections ensuring that it is more understandable. It should be noted however that overall, the Wikipedia article is still focused on RFC 3164 and not 5424.
Let’s look at how we clean-up the code.
Additional Parameters
To ensure that we have enough information to support RFC 5424, I needed to add some additional Parameters (which are not mandatory). These include ApplicationName, ProcessID, MessageID, StructuredData and a switch RFC 3164.
The switch RFC 3164 will simply tell the code to send a message in the RFC 3164 format, instead of sending it via RFC 5424 which is its default.
Hostname Generation
Previously, if the hostname parameter was not specified in my code, I simply used the hostname.exe. Whilst there isn't any problems with this, however RFC 5424 actually specifies in some detail how the hostname field should be determined:
- The FQDN of the server
- A static IP address
- The hostname of the server (Windows will always have on of these)
- Dynamic IP address
- A NILVALUE (-)
I have updated my code to generate the hostname component of the SYSLOG message via the first 3 steps.
Application Name
The Application name can be a little difficult. Typically from within a function we can determine the name of the script which is calling the function via 2 properties of the $myInvocation variable: ScriptName and PSCommandPath. I have used ScriptName with success in the past, and hence decided to use it again. There is one thing to note, if I am sitting at a console and call send-syslogmessage, then ScriptName will be null, and if that is the case, we will simply use “PowerShell”.
Process ID
The Process ID is new requirement to ensure RFC 5424. We get this simply from the $PID global variable.
Message ID and Structured Data
These two will always be user specified, if the user doesn't specify them, then send the default RFC 5424 nil value of "-".
Message Generation
Now that we have all of the information required for either RFC, we can now look at message generation. When it comes time, I simply have an ‘if’ statement that controls which format we want to use. The script will then format the timestamp and message accordingly.
Message generation looks like the following:
For RFC 3164, I fixed up the timestamp, and also added in the application name. For RFC 5424 there are some significant changes. I now correctly include the SYSLOG version (1), and then included the corrected timestamp, application name, process ID, message ID and structured data.
The Future
If there was a demand, I would be interested in extending the CMDLet to support the transmission of messages via TCP, as well as sending signed messages. Right now, I don't have a need for such things.
Conclusion
Now that all of those changes have been completed and tested, I have pushed the changes up to the PowerShellSyslog GitHub repository.
I want to thank DFCH again for raising the issue and helping me through the development of the fixes.
Kieran Jacobsen
Presenting at CrikeyCon 2015

I wanted to quickly let everyone know that I will be presenting at CrikeyCon again this year. Once again I am excited to be presenting, as well as nervous.
This year I will be doing something a little different from my usual presentations. This year I will be talking about the Hak5 USB Rubber Ducky. This is something I have wanted to show off and get more people interested in for a number of years, and am extremely excited by this opportunity.
My presentation this year will be shorter than usual, with only 15 minutes to perform a quick overview and some warm up demonstrations. I will then move to the events area along side my good friend Ash, and the always exciting Robert Winkel, where I will be showing off some more advanced demonstrations.
There is an amazing list of speakers again this year, and once again Patrick Gray will be the MC.
Last year, tickets sold out quickly, if you want to attend, then visit the Eventbrite page today to secure yours.
First Impressions: MSI GS30 Shadow Pt3 - The Dock
In this final post, I will talk about the GS30's dock and my overall thoughts on its performance.
Whilst the laptop is cool, everything is really talking about the dock. As I mentioned earlier, the dock consists of a PCI Express x16 slot, a 450 watt power supply, a KillerNIC, audio connectors (speakers and microphone), stereo speakers with sub-woofer and 4 USB3 ports.
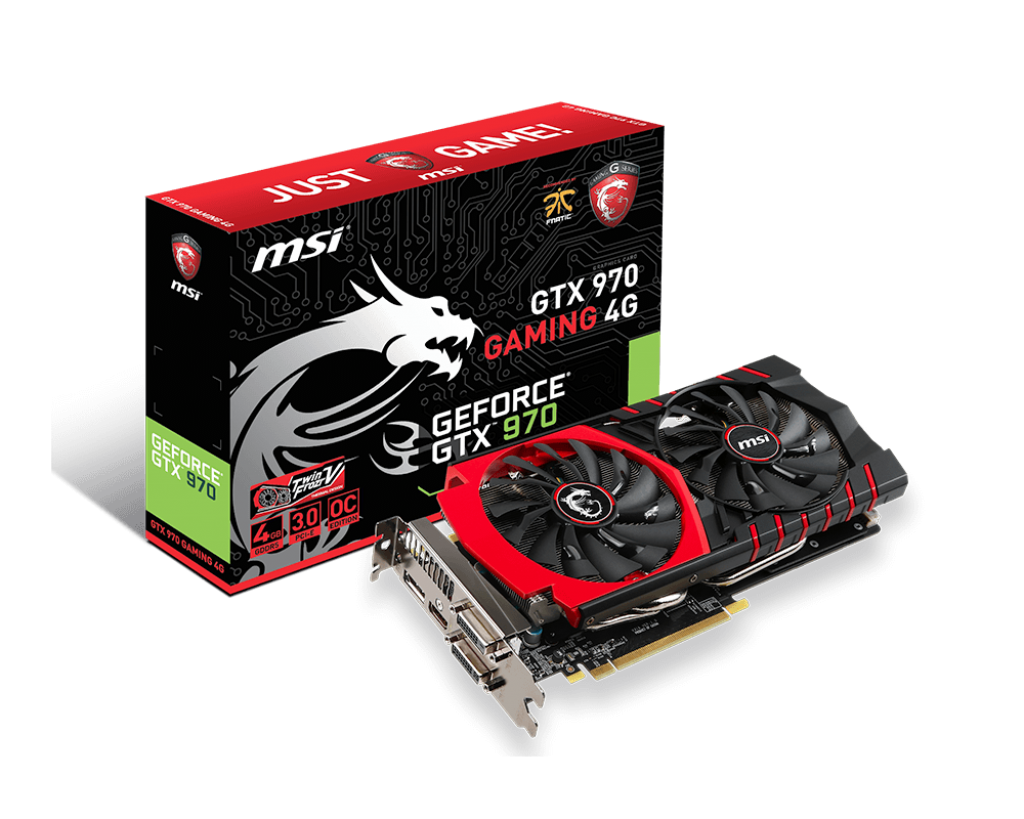
You can install any NVIDIA or ATI card you want into the dock, and from any manufacturer. It should be noted though that MSI has stated that all of their cards will work within the dock. I chose an MSI NVIDIA GeForce GTX 970 not only on the reviews, but also due to the fact I knew I would receive suitable support in such a configuration. The power supply in the dock has two 6/8 pin power plugs to supply power to whatever card you end up selecting. There is also a fan on one side to assist in keeping everything cool.
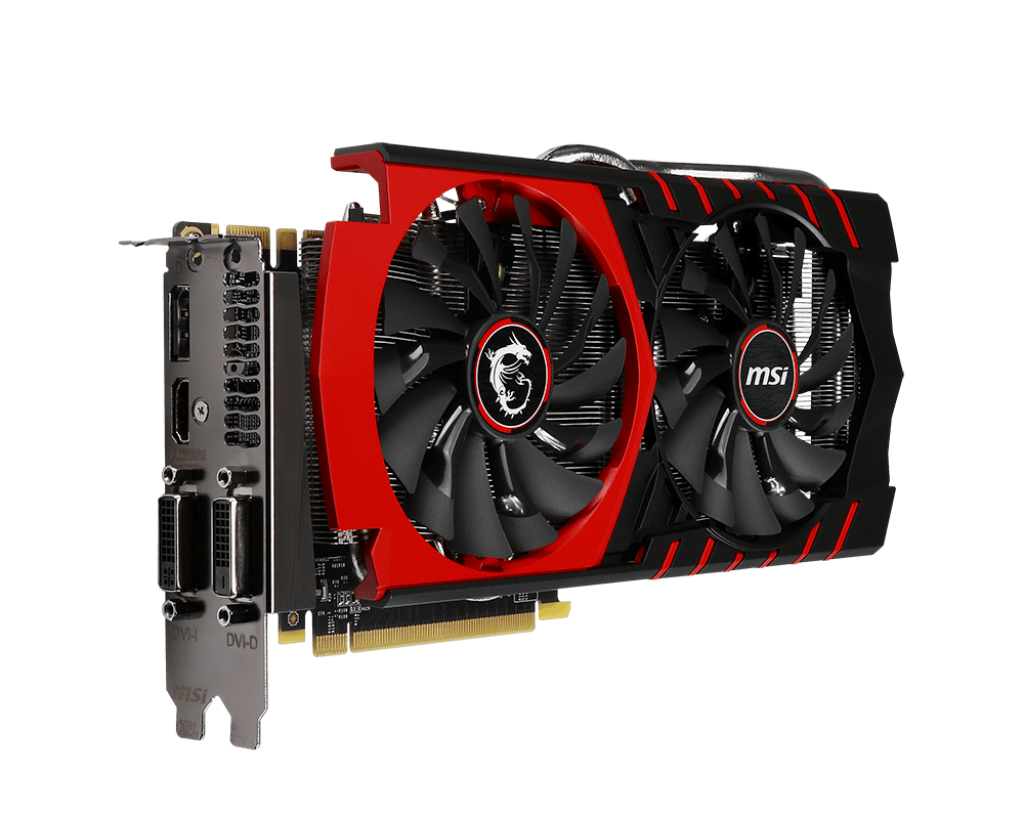
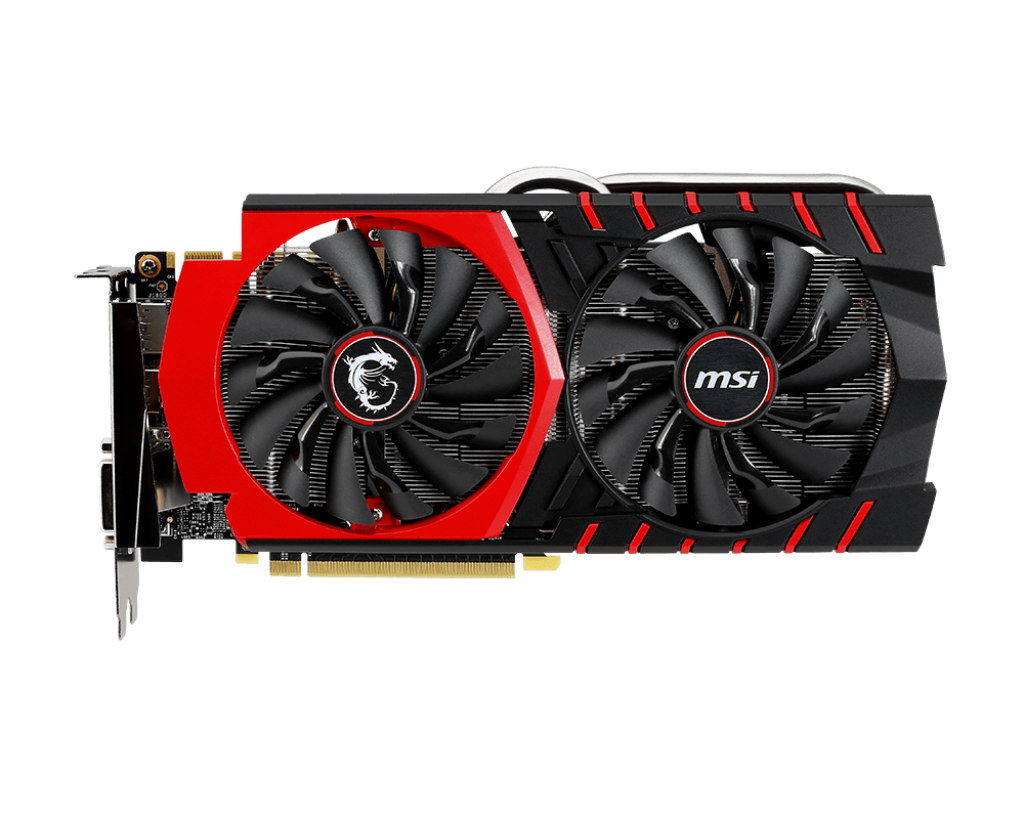
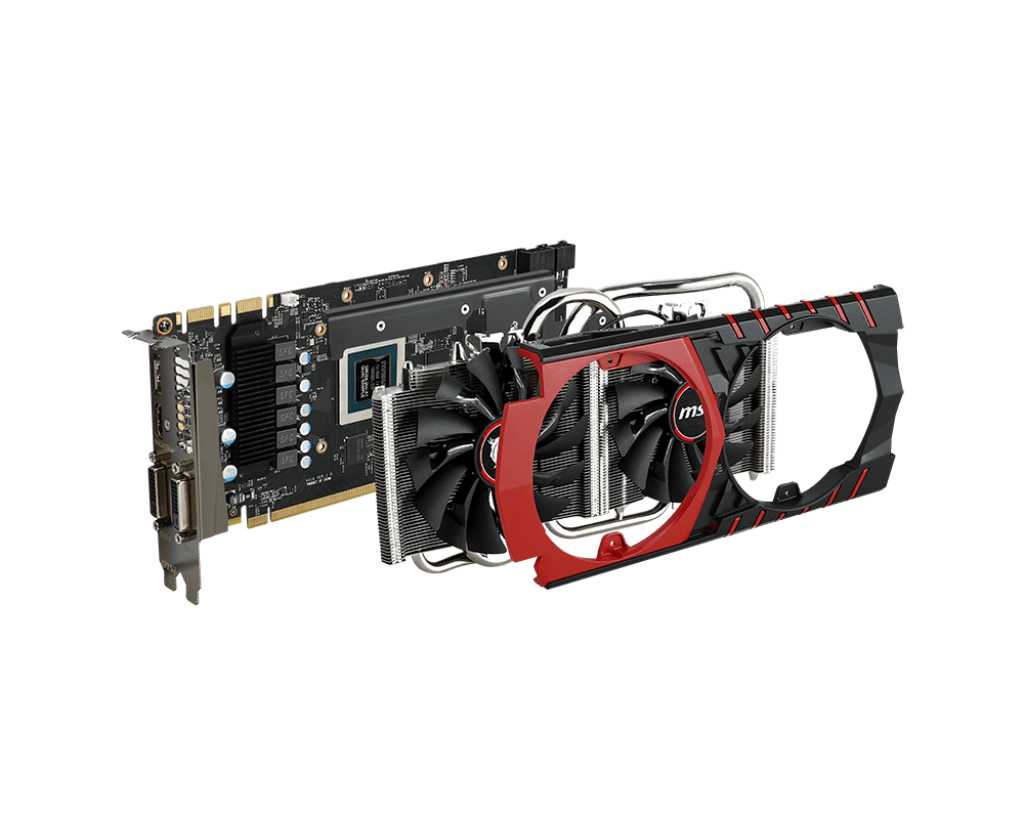
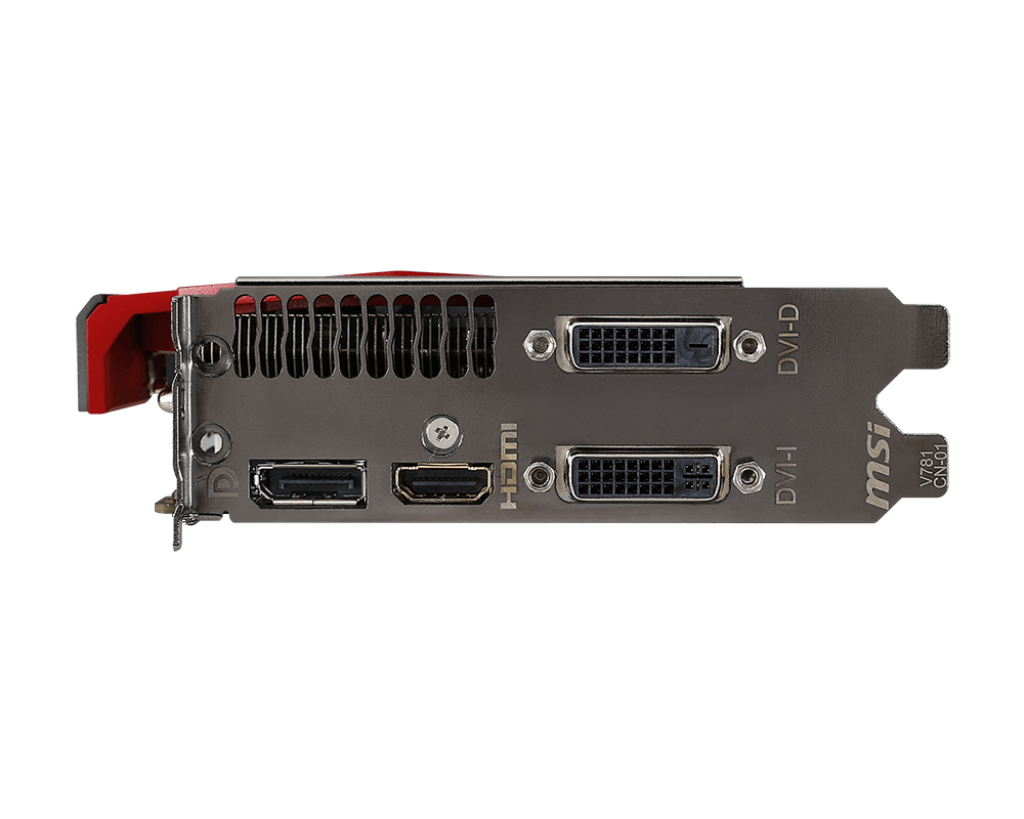
It is worth noting that MSI wasn't the first to come up with the idea of strapping a desktop graphics card to a laptop. Currently the other well-known vendor is Alienware. Alienware first offered the graphics amplifier to their 13 inch series, and in the latest generation it is available in the 15 and 17 series. MSi claim that the biggest difference between the GS30 and the Alienware is that their dock is a PCI Express x16 solution, whilst the Alienware is only x4. There is a significant bandwidth difference between PCI Express x16 and x4, however these claims haven’t been independently verified.
Connecting to the dock is a fairly straight forward process. Shutdown the laptop, place the laptop in the cradle and pull the handle to bring the two together. The locking process also ensures that there is now way the laptop could easily come away from the dock. For those who are wondering, the dock connector looks pretty much like a PCI Express connector. To undock, simply shutdown and unlock then push the handle to eject the laptop. You need to shut down, you cannot simply put your laptop to sleep or hibernate. My theory of how everything is working internally, and this is just conjecture, is that when connected, the dock is disconnecting the Intel Iris graphics and the Atheros Ethernet controller.
I chose to install my Western Digital 2TB Black Edition drive in the dock. This drive has all 240 of my Steam games, and has worked well for me in my previous system. Installation of the drive was also extremely easy, I recommend installing the hard disk prior to installing the video card.
The audio options on the dock are rather disappointing. Whilst it is great to see (hear) the stereo speakers and sub-woofer in the dock, I would have much rather seen a fully fledged sound card included. I previously used optical out to a set of Yamaha speakers, now I am going to have to go back to the drawing board because the GS30 dock only provides a standard headphone/speakers connector.
I have been extremely impressed by the performance of the GS30, dock and GTX970 combination. Whilst I haven’t spent much time playing games, only FireFall and BioShock Infinite, I can confirm the performance is quite remarkable. I was not disappointed running both games with their video settings maxed out. The fans on the laptop will ramp up during this time, but once again, it is nothing too serious.
For a detailed performance breakdown and benchmark, check out the review by Hexus here.
“Transforming a thin-and-light 13.3in laptop, the bundled GamingDock opens the door to greater storage, better connectivity, improved audio and a far superior graphics experience.”
Conclusion
Overall this is an exceptional laptop, be it as a work PC running virtual machines or visual studio, or at home as a gaming machine. This is a great work machine and a great home machine. I would definitely recommend it to people!
Whilst the laptop would probably struggle competing on its own against the likes of Alienware or the HP Omen, or even a business oriented device like the HP EliteBook Folio, when combined with the dock, it becomes one hell of a system.
MSI have done an amazing job, their engineers have created something exciting, unique and quite revolutionary. I will be very interested to see how they continue to develop and expand upon this concept in the coming years. Hopefully in 2 years when I am looking for a new laptop, they will have resolved some of my gripes and filled in some of the missing features.
“The GS30 Shadow is definitely one of the more interesting laptops we’ve seen, and for those that don’t need to have a ton of gaming power on the go it offers a nice blend of mobility with the option to hook up to a dedicated display and GPU at home for serious gaming.”
Summary
Pros:
- True Quad Core i7
- Docking station
- Lightweight Ultrabook
- 16Gb of memory
- Twin 128Gb SSDs
- Gaming performance when docked is equivalent to desktop systems
- Excellent option for work/life balance system
- All of your data in one place
- Dock features PIC Express 16x and one SATA 3 port
Cons
- No touch screen
- No TPM
- No NFC
- No KillerNIC Ethernet or WIFI on Laptop, KillerNIC only in dock
- Screen resolution could be higher
- Audio options could be better (no optical out)
- Need external monitor/keyboard/mouse when docked
- Need to shutdown to dock/undock
- 3 hours battery life
Improvements I want to see in the future
- Touch Screen
- TPM
- NFC
- Better audio options in the dock
- Windows 8.1 pro
- No Symantec AV
- Better driver update system
Kieran Jacobsen